Mastering Some Mysteries of 2-Element Beams Part 1
This talk was originally prepared for the 2001 Dayton FDIM Symposium
This talk was originally prepared for the 2001 Dayton FDIM Symposium
The decision to upgrade a single wire antenna into a multi-element beam marks a major step in QRP station sophistication. Whatever the band, whatever the material, a 2-element array is more than a simple doubling of elements. It represents additional gain, additional directivity, and additional responsibility to know how the thing works.
This small presentation is designed to remove some of the mystery from the 2-element directional beam. I shall not in this space be able to answer every question or treat every possible design. However, I do hope to accomplish two things. First, I want to look at the basic electronics of 2-element beams so that you can have a qualitative understanding of why things work like they do. Second, I want to provide you with a compendium of designs for 20 through 10 meters that will let you build some 2-element beams with confidence.
In the following pages we shall address a series of topics relating mostly to horizontal 2-element beams, with the hope that they have good order:
These topics cover a lot of ground, so we had best hitch the mules (a team of 2, of course) and begin plowing. Even so, we shall only cover the first 3 topics today. But there is always FDIM 7.
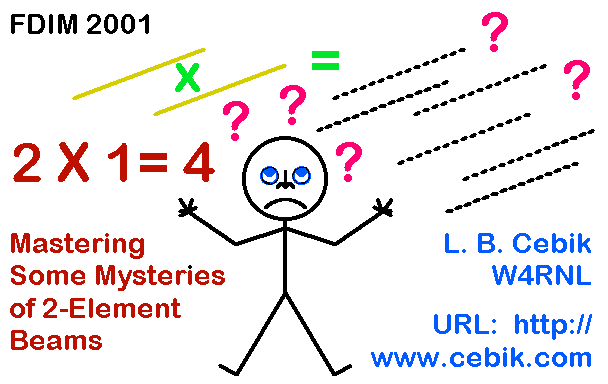
Let's begin with my title: 2 X 1 = 4. What does it mean? The answer lies within the common resonant 1/2þ dipole. If we place a dipole made from common materials, such as copper or aluminum, in free space, it will show a gain of about 2.1 dBi (dB over an isotropic source). When placed at least 1/2 wl over average ground, the same dipole will show a gain of about 7-8 dBi due to reflections from the ground. Fig. 1 shows the typical dipole pattern, a near-figure 8.

The gain of the dipole comes from the fact that radiation is concentrated broadside to the wire, with little radiation off the wire ends. The dipole is bi-directional. Now suppose that we could reduce one major lobe and enhance the other. Then we would have a directional beam with QRM reduction in 3 of the 4 major quadrants. No longer would that G station QRM our U.S. attempt to contact the VK or ZL.

Fig. 2 provides one of many typical 2-element directional beam patterns--with the antenna placed at the same height as the dipole. The beam consists of 2 elements, each of which is close to being a resonant 1/2 wl dipole--close but for many good reasons not quite. Note that the end nulls are just as strong as with the dipole, but as well, the rear lobe is reduced by many dB. The reduction in rear gain shows up as an increase in forward gain. A well-designed 2-element beam will have about 6 - 6.5 dBi free-space gain or about 11 - 12 dBi gain if placed at least 1/2 wl above average ground. The net gain over a dipole is about 4 dB. So, multiplying 1 dipole by 2 gives us 4 dB advantage--somewhere between 1 and 2 S-units. Add the rear QRM and QRN reduction, and you have a very worthy improvement to station performance.
Yes, you can get more gain and a higher-front-to-back ratio by going to more elements, stacked arrays, and so forth. However, the big step is going from 1 element to 2.
Now the question before us is simple: how do we shrink one lobe and expand the other one? To answer that question, we have to consider first how elements get their energy. Then we can turn to the question of how much energy per element in what exact form.

In Fig. 3 we have set two elements close to each other--close enough to lie in each other's "near field." The near field for our purposes represents the region where the elements closely interact, exchanging energy. Some call it inter-element coupling; others call it inductive coupling; still others call it mutual coupling. Whatever the name, some important things are happening relative to how energy is supplied and distributed.
First, we have a choice in supplying energy to the 2 elements. We can apply energy to both elements or to just 1 of the 2. Whichever way we choose, the elements both receive energy, either from the source or from each other. If we feed only one element, the unfed element receives energy by virtue of its close coupling to the fed element. It radiates the energy it receives and hence the fed element receives energy from the unfed element. If we feed both elements energy, each element both receives and re-radiates energy to each other. In either case, inter-element coupling determines to a very large measure the properties of the resulting antenna.
For any given set of near-resonant 1/2 wl elements at fairly close spacing (say, between 0.05 wl to about 0.5 wl), there will be an "ideal" energy relationship between the two elements. Now all we have to do is to define "ideal." Let's consider two definitions. First, we shall look at the ideal of having the maximum front-to-back ratio in the direction that is 180ø opposed to the maximum forward gain direction. We can call this the ideal of a maximum rear null. Second, we shall look at the ideal of obtaining maximum forward gain from the two elements. We can call this, quite obviously, the ideal of maximum gain.
To achieve either ideal, at the center of each of the 2 elements, there will be a certain current magnitude and phase angle combination. What that combination is will differ for each ideal. As well, it will differ as we change the lengths of the two elements, making one longer than, shorter than, or equal to the other. Third, the combination will differ as we change the spacing between elements. Finally, the combination will change as we alter the physical shape of the elements, perhaps by bending the ends toward each other.
Let's explore for a moment one of these variables that determines the combination of current magnitude and phase: spacing. As a little experiment, let's look at what happens when we phase both elements of two different array pairs, shown in Fig. 4. At a spacing of about 0.125 wavelength, the unequal element pair makes up a very workable 2-element Yagi for 28.5 MHz, when only the forward element is fed. At the same spacing, the equal-length pair is close to resonant, but with a typical dipole pattern.

Let's first set as our operating goal achieving a maximum rear null 180 degrees from the peak of the forward lobe. We can define the null as adequate if it exceeds -50 dB relative to the forward lobe. This value would exist only over a tiny bandwidth, but for study purposes, it is a goal that modeling programs, such as NEC-4, can easily show. We shall vary the distance between the elements in 0.05 wl increments. For each distance, we shall change the current magnitude and phase on the rear element until the desired null is achieved.
Table 1 shows the results for both element pairs. For this case, the current phase for each step is virtually the same for both types of arrays, but the required current magnitude on the rear element is different according to whether the elements have the same or different lengths. Other element lengths we might have chosen would have resulted in other values.
For each increase in spacing, the current magnitude changes very little, no matter which type of array we choose. However, the required phase angle on the rear element shows a continuous decrease, with the highest gain at the closest spacing of the elements. Some other considerations will limit our ability to use the very highest gain and still have the maximum null. In the end, there is no single ideal spacing for achieving a deep rear null. Instead, for any spacing, there is a current magnitude and phase angle that will achieve the null.
 . . . . . . . . . . . . . . . . . . . . . . . . . . . . . . . . . . . . . . .
Phasing 2 Elements for Maximum Rear Null
Equal vs. Unequal Element Lengths

                                                Rear Element Current
Spacing                 Mag.        Phase       F.S.        F-B
 wl         inches      (rel-       deg.        Gain        Ratio
                        ative)                  dBi         dB

Designed for Maximum Rear Null:
Equal-Length Elements (196.8" x2 at 28.5 MHz)
 0.05        20.7       1.035       163         6.55        >50
 0.1         41.4       1.07        145         6.46        >50
 0.15        62.1       1.09        125.5       6.18        >50
 0.2         82.8       1.09        106         5.76        >50
 0.25       103.5       1.07         87         5.14        >50
 0.3        124.2       1.045        69         4.26        >50
 0.35       144.9       1.02         51         2.72        >50
 0.4        165.7       1.00         34         0.31        >50

Unequal-Length Elements (192" forward, 208.1" rear at 28.5 MHz)
 0.05        20.7       0.925       163.3       6.57        >50
 0.1         41.4       0.945       145         6.45        >50
 0.15        62.1       0.955       126.0       6.19        >50
 0.2         82.8       0.95        106.7       5.77        >50
 0.25       103.5       0.94         88         5.16        >50
 0.3        124.2       0.92         69.5       4.21        >50
 0.35       144.9       0.90         51.8       2.73        >50
 0.4        165.7       0.88         34.5       0.28        >50

Note 1:  All forward element currents set at a relative magnitude of 1.0 at 0 degrees
phase angle.
Note 2:  All values of rear current relative magnitude and phase angle taken when
the rear null passed -50 dB relative to the forward lobe.
Note 3:  Elements are 1" diameter aluminum.

Table 1:  Phasing 2 elements for maximum rear null using equal and unequal
element lengths.
 . . . . . . . . . . . . . . . . . . . . . . . . . . . . . . . . . . . . . . .
Much of antenna element phasing theory is devoted to the achievement of rearward nulls. Little attention has been given to achieving maximum gain from the array. Let's look at Table 2 to see what the effects of changing space might have on the required rear element relative current magnitude and phase for this goal. For spacing from 0.05 through 0.25 wavelengths, the required current magnitude for each array remains relatively constant. However, the required phase angle decreases with increased spacing, but at far less than the rate for achieving a maximum rearward null. Maximum gain does not occur with the closest spacing, but in the vicinity of 0.1 wl. As one might expect, the front-to-back ratio of two elements becomes mediocre (at best) when the goal is maximum gain.
 . . . . . . . . . . . . . . . . . . . . . . . . . . . . . . . . . . . . . . .
                  Phasing 2 Elements for Maximum Forward Gain
                       Equal vs. Unequal Element Lengths

                                                Rear Element Current
Spacing                 Mag.        Phase       F.S.        F-B
 wl         inches      (rel-       deg.        Gain        Ratio
                        ative)                  dBi         dB

Designed for Maximum Rear Null:
Equal-Length Elements (196.8" x2 at 28.5 MHz)
 0.05        20.7       1.02        173         7.32        7.64
 0.1         41.4       1.03        165         7.35        7.19
 0.15        62.1       1.02        158         7.23        6.90
 0.2         82.8       1.03        152         7.03        6.00
 0.25       103.5       1.03        147         6.76        5.03

Unequal-Length Elements (192" forward, 208.1" rear at 28.5 MHz)
 0.05        20.7       0.91        173         7.33        7.70
 0.1         41.4       0.92        166         7.36        7.22
 0.15        62.1       0.92        159         7.24        7.03
 0.2         82.8       0.92        150         7.04        6.59
 0.25       103.5       0.93        147         6.77        5.13

Note 1:  All forward element currents set at a relative magnitude of 1.0 at 0 degrees
phase angle.
Note 2:  All values of rear current relative magnitude and phase angle taken when
the forward lobe reached a peak gain, beyond which gain fell off.
Note 3:  Elements are 1" diameter aluminum.

Table 2:  Phasing 2 elements for maximum forward gain using equal and unequal
element lengths.
 . . . . . . . . . . . . . . . . . . . . . . . . . . . . . . . . . . . . . . .
The differences in the azimuth patterns for the same antenna geometry, but set up for each of the ideal phasing conditions, are dramatic indeed. Fig. 5 shows the maximum forward gain ideal and the maximum rear null ideal in free-space azimuth patterns, using the unequal-element model and a spacing of 0.1 wavelength at 28.5 MHz.

Amateur 2-element beams strive for a workable compromise between maximum gain and excellent front-to-back ratio. As well, we demand coverage of a band of frequencies and not a single frequency. The little experiment resulted in arrays that achieve their impressive values only over a very tiny portion of even a WARC band. As well, amateur 2-element beams also strive for an operating impedance that yields a good match--either directly or through a simple network--to 50-Ohm coaxial cable. When we add up all of out demands, we are bound to hit some limitations. In fact, in the following sections of these notes, we shall be talking mostly in terms of limitations.

The sketch should familiarized you with the parts of a typical driver-reflector Yagi. As well, it will help to make you comfortable with some of the terms used in connection with such antennas. Note that when we have a single feedpoint, thus creating a driver or driven element, a reflector element will necessarily be longer than the driver in an optimized design. The main lobe of radiation (the forward lobe) will be ahead of the driver.
Before we plunge into further details of Yagi designs, let's establish a few facts of life. If we strive for maximum gain, we can achieve it--or something very close to it. However, the feedpoint impedance will be unreasonably low (under 10 Ohms), and the operating bandwidth over which we achieve the maximum gain will be far less than the bandwidth of any amateur band--with the possible exception of the WARC bands. So, for 20, 15, and 10 meters we shall have to settle for well under 7 dBi free-space gain.
Second, since the driver-reflector Yagi derives its properties from the geometry of the antenna, it also is limited by what we can do with 2 parallel linear elements, whatever their relative lengths or their spacing. With this configuration, it is not possible to achieve more than about 15 dB front-to-back ratio. If we add demands for a usable feedpoint impedance and a good operating bandwidth, we shall achieve some between 10 and 12 dB front-to-back ratio.
We can illustrate what is possible for a 2-element driver-reflector Yagi with some patterns and graphs for 10 meters, where the tested bandwidth is 28-29 MHz (or 28-29.7 MHz for a certain wide-band model). I chose 10 meters because the desired 1 MHz bandwidth of 3.5% is wider than the bandwidth of 20 meters (2.5%) or 15 meters (2.1%). Hence, if a given design is satisfactory for the 10-meter band, it will--when properly scaled--be satisfactory for 20 or 15 meters. However, remember that scaling involves changes of element length, elements spacing, and element diameter. If you forget to scale the element diameter, your design may be well off the mark.
We shall encounter some graphs and numbers in working with Yagis, and sometimes their significance can be elusive. For example, how much operational advantage do I gain by adding 1 dB of front-to-back ratio? Is a half dB of added forward gain significant? Fig. 7 shows the free-space azimuth patterns of a narrow-band (1 MHz) 10-meter Yagi at the band edges and at center band. In the forward (graphical upward) direction, the spacing between lines is about 1/2 dB. In the rear, directly opposite the main forward direction, the front-to-back ratio shows a 1.5 dB total change. For the antenna portrayed, the operator would not be able to tell the difference with sophisticated test equipment--and he would lose many QSOs setting up that equipment.

For basic comparisons among antenna designs, we often use "free-space" models and performance figures. Compare Fig. 7 to Fig. 2: note that the azimuth pattern taken over ground show more gain--the result of adding ground reflections to the basic gain level--and shallower side nulls than the free space model. In general, a given design does not restore all of its side rejection until it is much higher than 1 wavelength above ground.
Actually, we shall look at two basic driver- reflector designs. One is a narrow-band version designed to cover 28-29 MHz with under 2:1 SWR when properly matched to a 50-Ohm coaxial cable. The antenna uses elements spaced about 1/8 wavelength apart, a distance the represents a good compromise between gain and a usable feedpoint impedance (about 35 Ohms resistive). The second design strives for two goals: coverage of the entire 10-meter band and a direct 50-Ohm feed that requires no matching network. The elements are spaced about 0.175 wavelength apart. Table 3 presents the dimensions for the two antennas using 0.5" aluminum elements.
 . . . . . . . . . . . . . . . . . . . . . . . . . . . . . . . . . . . . . . . . . . . . . . . . . . . . .
                                     Narrow-Band 2-Element Yagi Design
Design Range:                                      28.0 - 29.0 MHz
Element Diameter:                                  0.5"
Driver Length:                                     16.1'
Reflector Length:                                  17.4'
Element Spacing:                                    4.32' (1/8 þ)

                                      Wide-Band 2-Element Yagi Design
Design Range:                                      28.0 - 29.7 MHz
Element Diameter:                                  0.5"
Driver Length:                                     15.9'
Reflector Length:                                  17.3'
Element Spacing:                                    6.0' (0.175 þ)

Table 3.  2-element driver-reflector dimensions for 10 meters.
 . . . . . . . . . . . . . . . . . . . . . . . . . . . . . . . . . . . . . . . . . . . . . . . . . . . . .
Unless you use 1/2" aluminum tubing, the required dimensions will not be identical for your version of these beams. We shall discuss the effects of real materials at length momentarily. We shall also look at some construction alternatives and what they mean for the builder's final dimensions. Before getting that specific, let's look at the relative performance of these two antennas, which differ mostly in the element spacing. The 1.7' difference may not be much on 10 meters, but it becomes a 3.4' difference on 20 meters. However, we may not need a wide-band design for 20 and 15 meters.

Fig. 8 graphs the gain of both antennas across all of 10 meters. Let's note several features of the graph. First, for all driver-reflector designs with reasonable feedpoint impedances and decent front-to-back rations, the peak gain will occur below the lower band edge. As you go down the band, the resistive portion of the feedpoint impedance decreases, which coincides with the gain curve. (The gain curve properties will change if we use a director instead of a reflector.)
Second, note that the narrow-band Yagi does not simply go to pot above its highest operating frequency. The gain curve parallels that of the wide-band version, even though the user is unlikely to get a low SWR above 29.0 MHz. When thinking about operating bandwidth, always consider what the limiting factors are. In some cases, it may be the SWR curve. In other cases, it may be a steep curve for the front-to-back ratio.

The two Yagi designs exhibit rather modest slopes to their front-to-back curves, as shown in Fig. 9. There is only about a 0.5 dB difference in the peak values for the two designs. More important is the fact that the narrow-band version is designed to peak about 28.5 MHz, while the wide-band version is set to peak somewhat higher in frequency. The goal in both cases is to have reasonably equal front-to-back ratios at the limits of the respective operating passband.

Similar design considerations go into setting the SWR curves, shown in Fig. 10. The narrow-band version has an SWR under 2:1 for the 28-29 MHz region, while the wide-band version shows under 2:1 SWR for the entire 10-meter band.
However, to fully understand the curves, let's note that each is based on a different resonant impedance. The resonant feedpoint impedance increases as we separate a driver and reflector. The wide-band version is based on a direct 50-Ohm feed and uses 50-Ohm resistive impedance as the baseline. The gradual curves--which almost always are steeper below the design frequency than above it--result from the increasing reactance that occurs off resonance: capacitive below resonance, inductive above it.
The narrow-band antenna shows a resonant impedance of about 35 Ohms resistive. The same levels of reactance--when added to the lower resistance--result in steeper SWR curves. We use these curves because they generally trace the performance you will get relative to 50-Ohms once you place a proper matching network at the feed point.
Let's take up 4 questions related to these Yagi designs before moving on to other types of 2-element beams:
1. Why don't I get 50 dB front-to-back ratio or 7+ dBi free-space gain? There is a limit to the ability of paralleled linear elements to obtain the ideal relative current magnitude and phase, whether "ideal" means a deep rear null or maximum gain. Although the comparison is not absolutely precise, we can look back at the ideal numbers for the experimental models using unequal element lengths and compare them with the mid-band values for each of our designs.
Table 4 lists the ideal numbers from the experimental models for element separations ranging from 0.1 to 0.2 wavelengths. The two actual Yagi designs have element spacings that fall between these limits. In all cases, the forward element is assigned a current magnitude of 1.0 and a phase angle of 0 degrees.
Immediately apparent is the fact that the current magnitude for the actual designs is well below the optimal level for either the maximum rear null or the maximum forward gain ideal. The current phase is within the "ballpark" of what is ideal. However, paralleling two elements while obtaining a usable front-to-back ratio and a usable feedpoint impedance requires a spacing (as well as element lengths) that prevents us from reaching the required near-equality of current magnitude on the two elements. Geometry limits what we can do with only two elements to achieve the ideal--and still have an antenna that we can easily use.
 . . . . . . . . . . . . . . . . . . . . . . . . . . . . . . . . . . . . . . .
                                                Rear Element Current
Spacing                 Mag.        Phase       F.S.        F-B
 wl         inches      (rel-       deg.        Gain        Ratio
                        ative)                  dBi         dB

Maximum rear null:
 0.1         41.4       0.945       145         6.45        >50
 0.15        62.1       0.955       126.0       6.19        >50
 0.2         82.8       0.95        106.7       5.77        >50
Maximum gain:
 0.1         41.4       0.92        166         7.36        7.22
 0.15        62.1       0.92        159         7.24        7.03
 0.2         82.8       0.92        150         7.04        6.59
Narrow-Band design at 28.5 MHz:
 0.125       51.8       0.67        143         6.20        11.12
Wide-Band design at 28.6 MHz:
 0.175       72.0       0.60        129         6.05        10.68

Table 4.  A comparison of relative current magnitude and phase between ideal and
real Yagi designs.
 . . . . . . . . . . . . . . . . . . . . . . . . . . . . . . . . . . . . . . .
Nevertheless, the added 4 dB of gain over a dipole and the 2 S-units of front-to-back ratio are highly useful. We can add more elements, but the increment of improvement for each new element will not equal the improvement we have made by adding just one element to a dipole.
2. What can I do to match the narrow-band antenna to my coaxial cable? The wide-band Yagi has served us well for several demonstrations. It showed us how increasing the element spacing increases the feedpoint impedance of a 2-element driver-reflector Yagi. It also showed us that complete coverage of 10 meters is possible. However, we shall turn away from this design in favor of the narrow band design. The narrow-band design is suitable for scaling to 20 and 15 meters with complete band coverage in each case.
Before we leave the wide-band design, let us remember that it is intended for direct connection to a 50-Ohm coaxial cable. However, the potential for common-mode currents on the cable strongly suggests that we insert a 1:1 choke--sometimes called a choke balun--at the antenna feedpoint. Whether we choose the W2DU design of placing ferrite beads on a 1' length of coax or some other design, the use of a choke is a wise precaution to prevent pattern distortion that might occur under certain conditions due to some antenna current being present on the outside of the coax braid. As well, the choke tends to suppress RF that gets back into the shack, distorting the SWR readings and possibly disrupting some sensitive circuits in our transmitters. Some folks wait until trouble shows itself before adding a choke at the 50-Ohm feedpoint. My preference is good preventive engineering, so I add one as a matter of course.
The narrow-band version of the antenna has a resonant feedpoint impedance of only about 35 Ohms. We can run the antenna with a direct feed, but the SWR will be fairly high across the band, never dropping below 1.4:1 and exceeding 2:1 at one band edge or the other.
If the natural feedpoint impedance had been about 25 Ohms, we might leave the driven element resonant and use a 37-Ohm 1/4 wavelength matching section, made up from 2 parallel sections of 75-Ohm cable. (RG-59 is close enough, but be sure to adjust the 1/4 wavelength requirement by the velocity factor of the line used: about 0.67 for solid dielectric and about 0.78 for foam.) However, the matching section is not especially apt to our narrow-band 2-element Yagi.
There are 3 popular matching techniques. The gamma match and the Tee match both work and both permit the driven element to be directly connected to the boom. However, both add considerable mechanical complexity to the driver, especially in the number of component part connections, each of which has a small resistive loss and the sum of which can rob power by turning it into heat. If it does not happen on installation day, it usually grows as the antenna ages in place.
My personal preference for HF matching is the beta match. Let's take a brief look at what it is and what it does.
The beta match appears to be simply a small coil or hairpin placed across the terminals of an antenna, most often a Yagi. Some folks mistake the coil for an RF choke, while others mistake the hairpin for a short circuit.
Actually, the beta coil or hairpin is one part of an impedance matching circuit, where the remaining elements are invisible, if you do not know what to look for. Many Yagi antennas have feedpoint impedances in the 20 to 35 Ohm range, somewhat low for feeding directly with coaxial cable. We need to raise the impedance to 50 Ohms--and that is what the beta match system does. The coil is not the only element in the circuit. There is also a capacitor--or, more correctly, some capacitive reactance. We get that part of the circuit from the antenna element itself.

Fig. 11 shows how we move from a resonant driven element to a beta match. Let the resonant antenna impedance be low, say about 25 Ohms. If we shorten the element, the resistance does not change significantly, but the antenna becomes capacitively reactive, as the middle part of the figure shows.
If we shorten the element by the right amount, we get the right capacitive reactance in series with the antenna resistance to go together with an inductance across the coil to make an L-circuit. An L-circuit is one of the fundamental impedance transformation circuits, and in this case, -Xa and XL together change the 25-Ohm antenna resistance to 50 Ohms.
We can calculate the needed values if we know the antenna feedpoint resistance (Ra). (We know that coax has a characteristic impedance (Ro) of 50 Ohms.) First we calculate a value called "delta" by some and "working Q" by others. Delta = the square root of [(Ro/Ra)-1]. Now we can easily calculate the necessary values of capacitive reactance in the antenna (-Xa) and of inductive reactance to place across the terminals (XL). Xa = Delta times Ra. XL = Ro / Delta.
Since these values are given as reactances, you need to convert the inductive reactance into a component value. The capacitive reactance will be developed by simply shortening the antenna element until the beta match gives us 50 Ohms.
For reference, Table 5 presents some of values we commonly encounter with beta matches with 50-Ohm coax for various values of antenna feedpoint resistance (Ra):
 . . . . . . . . . . . . . . . . . . . . . . . . . . . . . . . . . . . . . . . . . . . . . . . . . . . . .
Ra               35               33               25               17                12.5
Delta            0.6              0.7              1.0              1.4               1.7
Xa               22.9             23.6             25.0             23.6              21.7
XL               76.4             70.7             50               35.4              28.9

Table 5.  Some common values encountered in beta matching networks for antennas.
 . . . . . . . . . . . . . . . . . . . . . . . . . . . . . . . . . . . . . . . . . . . . . . . . . . . . .
Notice that the capacitive reactance reaches a peak when delta = 1, while the inductive reactance gets smaller as the feedpoint resistance gets smaller.
We have not yet converted these inductive reactances (XL) into a component value, because there are two distinct ways to achieve the required reactance across the coil. Fig. 12 shows them both:

The beta inductor is simply a coil with the value of inductance that provides the inductive reactance at the operating frequency. If you divide the required inductive reactance by the product of the operating frequency (in Hz) and twice pi, you get the right inductance.
The hair pin version of the beta inductor is actually a small shorted stub of parallel transmission line. Rather than go through the calculation procedure, I shall simply once more recommend that you obtain a recent copy of HAMCALC, a suite of handy ham calculation programs in GW Basic. You can get a copy for $7 to cover CD-ROM and mailing costs from George Murphy, VE3ERP, 77 McKenzie Street, Orillia, ON L3V 6A6, Canada. Among the selections on the disk is an excellent program that will calculate the dimensions of a hairpin for the match. It was written by Thomas Cefalo, Jr., WA1SPI. The program will also tell you the equivalent inductance in case you want to wind a coil. Other programs in HAMCALC will help you wind an accurate coil.
Many antenna builders use the experimental technique of adjusting the driven element for a beta match. After calculating the beta coil or hair pin, they install it and then adjust the element length for a low SWR. Antenna modelers tend to determine the required element length in advance from their software and save some time fumbling for the right element length.
Either way, the beta match results in a very low loss match. For inductor Qs over 100 (easy to obtain, but some maintenance is required to maintain the Q), losses will be well under 1%--and even less for the hairpin.
If you like to build antennas, you should become familiar with the beta match. Some folks actually avoid the beta match because it is "too simple to really work." However, it does work, and very well indeed for antennas with moderately low feedpoint impedances. Since there are easy-to-use utility programs for calculating everything you need, there is no need to avoid either the beta match or antennas that require one.
Our narrow-band antenna for 10 meters, with a 35-Ohm impedance requires that we shorten the driven elements from 16.1' to about 15.7' to supply the 22-23 Ohms of capacitive reactance. Then we place a coil or hairpin (shorted stub) with 76 Ohms of inductive reactance at 28.5 MHz across the feedpoint. As just one example among many, a hairpin made from #12 AWG wire (0.0808" diameter) and spaced 1.5" will require a length of 11.2" to do the job, while a coil of 0.43 microH will do the same job. Of course, every good builder leaves himself some room for final adjustment.
3. What happens if I use a combination of aluminum tubing for the elements? Before we look at the answer to this question, let's begin with a word of caution. Many new antenna builders go to the hardware store and buy aluminum conduit to use for beam antenna elements--mostly because it is cheap and available. My suggestion is to avoid this material. It is heavy and tends to be soft. Purchase 6063-T832 or 6061-T6 tubing from a reputable dealer (Texas Towers is one of many). It is much better suited to the task and is not very expensive. By mail, it comes in 6' lengths, and many ham antenna designers tailor their designs to this length.
If we use tubing such as this, we shall have to taper the element diameter as we move out from the center of each element. The key question is what this move does to the required element lengths for a given spacing.

Fig. 13 is designed to give us some idea of how various element shapes affect the resonant length of antenna elements. If the element flares outward, as with the bi-conical, the resonant length is shorter than for a uniform diameter element. If the element diameter grows smaller as we move outward--either in a smooth or stepped taper--it must be longer than a uniform diameter element. And what applies to a resonant element also applies to a parasitic element.
Therefore, if you simply take the element lengths that we have given for the 10-meter beams but use a set of nested tubes, it is likely that the result will not perform to standards. With no standard antenna with which to compare the home-brew Yagi, you may never be aware of how far from peak performance the array is.
To save you the trouble of buying a complete modeling software program to develop tapered element designs, I have taken a pair of standard ARRL Antenna Book element taper schedules for each band (20-15-10) and refigured the element lengths in advance. Element tapering uses fairly complex equations developed by Dave Leeson and incorporated into the best commercial modeling software. So please do not think that you can do the job just be averaging the element diameters--or by guessing. If you want to use an element diameter taper schedule that does not match one of these versions, you will have to go back to the model-drawing boards and refigure the element lengths from scratch.
In each case, a basic uniform-diameter model serves as the basis for each design that is modified for a tapered element schedule. For each of the three wide HF bands, we shall present a graphic of the taper schedules used, followed by a table of values for the outer section and the total (1/2-element and full-element) lengths. The lengths given assume that all elements are insulated from the boom.

 . . . . . . . . . . . . . . . . . . . . . . . . . . . . . . . . . . . . . . . . . . . . . . . . . . . . .
                                              Element Lengths
Element                           Outer                             1/2-El.           Element
                                  Section                           Length            Length
Narrow-Band Version:  0.5" Uniform Diameter
Driver                                                               96.6"            193.2"
Reflector                                                           104.4"            208.8"
Medium Duty Taper Schedule Version
Driver                            61.6"                              97.5"            195.0"
Reflector                         69.6"                             105.6"            211.2"
Heavy Duty Taper Schedule Version
Driver                            55.9"                              97.9"            195.8"
Reflector                         64.5"                             106.5"            213.0"
Wide-Band Version:  0.5" Uniform Diameter
Driver                                                               95.4"            190.8"
Reflector                                                           103.8"            207.6"
Medium Duty Taper Schedule Version
Driver                            60.4"                              96.4"            192.8"
Reflector                         69.0"                             105.0"            210.0"
Heavy Duty Taper Schedule Version
Driver                            54.6"                              96.6"            193.2"
Reflector                         64.0"                             106.0"            212.0"

Table 6.  Element lengths for 10-meter tapered-diameter 2-element Yagis.
 . . . . . . . . . . . . . . . . . . . . . . . . . . . . . . . . . . . . . . . . . . . . . . . . . . . . .
Although the differences between the uniform-diameter and the tapered diameter versions of the same beam appear to be small, they are critical if the builder wants to achieve the level of gain, the front-to-back ratio, and the SWR curve that has been shown. Unlike casual wire antenna building, constructing a Yagi requires considerable care and reasonable precision. Nest each tube size about 3" inside the next larger size. Less nesting length weakens the element; more nesting increases weight unnecessarily.
4. How do I build versions of these antennas for 20 or 15 meters? The basic process of transferring a successful antenna design from one frequency to another is to scale the design. Divide the old frequency by the new one. Then use this ratio to multiply each element length, the element spacing, and the element diameter. A 190" 0.5" diameter element for 28.5 MHz wants to be 1.343 times larger in every way when scaled for the middle of the 15-meter band (21.225 MHz). The length becomes 255.1" and the diameter will be 0.67".
Obviously, we must use either 5/8" or 3/4" diameter tubing, which means that the scaling will not be precise. Some adjustment will be needed to the element lengths (which are more sensitive to change than the element spacing) in order to bring the design to the exact results that we want.
To save you some work, I have scaled and adjusted the narrow-band version of the 2-element driver-reflector Yagi for use on 15 and 20 meters. We do not need the wide-band version unless we simply wish to have a 50-Ohm direct feed system. Each beam has a band center resonant feedpoint impedance of about 35 Ohms. For use with a beta match, each driver will need to be shortened proportionally to the shortening used for the 10-meter version. A useful figure is to shorten each driver by 2.5% to achieve the correct capacitive reactance to go with the beta reactance to form the L-network. Of course, you will have to recalculate the beta coil or beta hairpin (shorted stub), since the inductance or line length required changes for a given inductive reactance as we change frequency. If you use materials or wire-spacing other than the #12 wire in the 10-meter example, the required hairpin length will also change. It pays to have a handy program like HAMCALC around to help calculate the hairpin.
Table 7 provides the basic dimensions for a uniform-diameter 2-element Yagi for both 20 and 15 meters. Following these dimensions are graphics showing the taper schedules for medium duty and heavy duty versions of the antenna. The difference between medium and heavy duty is a wind speed of 75 miles per hour for the lighter version and about 100 miles per hour for the heavier version. Then, for each band, there is a table of construction values.
. . . . . . . . . . . . . . . . . . . . . . . . . . . . . . . . . . . . . . . . . . . . . . . . . . . . .
                                      15-Meter 2-Element Yagi Design
Design Range:                                      21.0 - 21.45 MHz
Element Diameter:                                  0.75"
Driver Length:                                     21.5'
Reflector Length:                                  23.4'
Element Spacing:                                    5.80' (1/8 þ)

                                      20-Meter 2-Element Yagi Design
Design Range:                                      14.0 - 14.35 MHz
Element Diameter:                                  1.0"
Driver Length:                                     32.2'
Reflector Length:                                  35.0'
Element Spacing:                                    8.7' (1/8 þ)

Table 7.  2-element driver-reflector dimensions for 15 and 20 meters.
 . . . . . . . . . . . . . . . . . . . . . . . . . . . . . . . . . . . . . . . . . . . . . . . . . . . . .
As a side note, we can use a PVC boom for the 10-meter Yagi. However, the length and element load for 15 and 20 meters makes PVC impractical, due to its tendency to sag. For 2-element beams, you can use 0.58" wall tubing in a size about 1.25" to 1.5" outside diameter. However, for better strength, insert another section of tubing the next 1/8" outside diameter smaller in the larger boom tube. The added strength will also help to prevent tube crushing by the U-bolts used to secure the element plates and the mast plate.
If you purchase 6' tubes by mail, you can join them to form a longer (20-meter) boom using the double tubing method. The 8.7' element spacing calls for a 6' and a 3' section of tube. Just be certain that the junctions are reversed so that the "3+6" outer tube has a "6+3" arrangement of the inner tube. Obviously, if you have access to 1/8" wall aluminum tubing (or 1" to 1.25" nominal [1.25" to 1.4" actual outside diameter] aluminum [6061- T6] pipe used for scaffolding), you can save a bit of work for the long boom. Avoid the softer aluminum electrical conduit if possible, although for the 10 meter and 15 meter beams, it should be adequate if the actual outside diameter is at least 1.25".
The lesson is simply this: select materials for the boom as carefully as you would for the elements. The load on a boom increases rapidly as it grows longer and the elements also grow longer.

 . . . . . . . . . . . . . . . . . . . . . . . . . . . . . . . . . . . . . . .
                                Element Lengths
Element                 Outer                   1/2-El.     Element
                        Section                 Length      Length
Narrow-Band Version:  0.75" Uniform Diameter
Driver                                          129.0"      258.0"
Reflector                                       140.4"      280.8"
Medium Duty Taper Schedule Version
Driver                  71.5"                   131.5"      263.0"
Reflector               82.9"                   142.9"      285.8"
Heavy Duty Taper Schedule Version
Driver                  48.8"                   132.8"      265.6"
Reflector               59.9"                   143.9"      287.8"

Table 8.  Element lengths for 15-meter tapered-diameter 2-element Yagis.
 . . . . . . . . . . . . . . . . . . . . . . . . . . . . . . . . . . . . . . .
Immediately apparent is the fact that the elements have grown to more sizable proportions. Hence, they will be more ungainly and harder to handle when raising the beam to full operating height. Hence, it pays to have proportionately more helpers around when erecting the beam. As well, the desired height of at least a half wavelength (and much more, if accessible) has risen from 16 to 22 feet, while a full wavelength height has stretched from 35' to about 22' up.
You may also notice that the medium duty taper schedule for 15 meters uses the same element sizes employed in the 10-meter heavy duty design shown earlier. We shall very shortly discover that the 20-meter medium duty design uses the same element sizes that were for heavy duty use on 15 meters. However, achieving the duty rating is not simply a matter of tubing diameter. In addition, the length of each tube in the sequence also contributes to the duty rating. Therefore, do not change the lengths for each size tubing without recalculating the load--a task for which there are some programs, such as YagiStress by Kurt Andress. As we increase the beam size, mechanical factors become as important as electrical factors in the total design.

 . . . . . . . . . . . . . . . . . . . . . . . . . . . . . . . . . . . . . . . . . . . . . . . . . . . . .
                                              Element Lengths
Element                           Outer                             1/2-El.           Element
                                  Section                           Length            Length
Narrow-Band Version:  1.0" Uniform Diameter
Driver                                                              193.2"            386.4"
Reflector                                                           210.0"            420.0"
Medium Duty Taper Schedule Version
Driver                            61.0"                             199.0"            398.0"
Reflector                         77.3"                             215.3"            430.6"
Heavy Duty Taper Schedule Version
Driver                            47.8"                             201.8"            403.6"
Reflector                         64.5"                             218.5"            437.0"

Table 9.  Element lengths for 20-meter tapered-diameter 2-element Yagis.
 . . . . . . . . . . . . . . . . . . . . . . . . . . . . . . . . . . . . . . . . . . . . . . . . . . . . .
Perhaps the only new notable item in the 20-meter beams is the heavy-duty element structure. The element diameter jumps from 1.25" at the element center down to 1.0" for the next section. For strength, the schedule assumes that center piece is actually two pieces of tubing--a 1.25" and a 1.125" diameter section, used together.
The remaining elements of construction can be gleaned from any recent copy of the ARRL Antenna Book and the myriad of beam articles that have been written in any of the amateur magazines in the last decade. I would not go back too much beyond 1990, especially for beam designs. Before 1990, much of Yagi design done by amateurs was by-guess-and-by-gosh, with inflated performance claims made in the absence of good measurements or good modeling software.
Although the driver-reflector 2-element Yagi has an important place among amateur beams, it is not the only kind of 2-element parasitic beam available. In stead of using a reflector behind the driven element, we may also use a director ahead of the driver. Fig. 17 shows the outline and main components of such an array.

Although I shall not ultimately recommend this kind of design for 10 meters, except in very specific cases, it may be useful to develop a 10-meter version of this antenna in order to compare it with the 10-meter driver-reflector antennas that we have examined in detail. Table 10 provides us with the general dimensions of very usable 10-meter beams of both designs, where the reflector model is the one we called the narrow-band version.
 . . . . . . . . . . . . . . . . . . . . . . . . . . . . . . . . . . . . . . .
                         Driver-Reflector Yagi Design
Design Range:                       28.0 - 29.0 MHz
Element Diameter:                   0.5"
Driver Length:                      16.1'
Reflector Length:                   17.4'
Element Spacing:                     4.32' (1/8 wl)
                          Driver-Director Yagi Design
Design Range:                       28.0 - 29.0 MHz
Element Diameter:                   0.5"
Driver Length:                      17.1'
Director Length:                    16.1'
Element Spacing:                     2.8' (0.08 wl)

Table 10.  2-element driver-reflector and driver-director dimensions for 10
meters.
 . . . . . . . . . . . . . . . . . . . . . . . . . . . . . . . . . . . . . . .
Since the driver has become the rear element in the director-beam, we can easily see that the lengths of the forward and rear elements are quite similar for the 2 designs. However, one crucial dimension is very different: the element spacing.
When we place a director ahead of a driven element, the gain increases as we shrink the element spacing until we reach about 0.05 wavelength distance. The design we have selected uses a wider spacing. Remember that all amateur beams are compromises. As we shrink the element spacing of the driver-director design, the feedpoint impedance becomes very low. I have drawn a line at about 20-Ohms resistive impedance as a means of reducing power loss due to the inevitable slight losses in connections between component parts of the antenna. Hence, I use the 0.08 wavelength spacing, which yields a resonant feedpoint impedance of about 22-23 Ohms with the half-inch diameter elements in the example. In general, a spacing of 0.07 to 0.08 wavelength is usable and lends itself to a simple beta match.

Fig. 18 gives us a partial perspective on what we get with a driver-director Yagi: a bit more gain and a lot more front-to-back ratio at the design frequency. Given that the boom length is shorter than for the driver-reflector design, it would seem that we should abandon the lower performance Yagi version and adopt the driver-director beam as our standard. This hasty conclusion is why I called the azimuth pattern only a partial view of the director-beam's performance potential. In order to see a fuller picture, we should compare the performance of the two candidates across the first MHz of 10 meters.

Fig. 19 compares the free-space gain of the two types of Yagis, each with a design frequency of 28.5 MHz. The reflector version gain picture--with its descent as we increase frequency--is already clear to us. The driver-director version shows just the opposite sort of curve. Gain increases with frequency. In fact, the rate of increase is higher than the rate of decrease for the driver-reflector beam type. As a result, the director version almost reaches its peak possible gain before we cross the 29 MHz point in the graph. Note that the director version has a lower gain at the low end of the passband than the reflector version has at the upper end of the passband. Those who wish to have a relatively even performance across the 28-29 MHz span would likely be better off with the reflector version of the antenna.

Where the driver-reflector Yagi holds the greatest superiority is in the front-to-back ratio department. As Fig. 20 clearly shows, the director-type Yagi has a higher front-to-back ratio than the reflector type across almost all of the passband. Had I been willing to move the peak value a bit higher in frequency, I might have made the claim to superiority apply to the entire passband. However, I chose to set the peak front-to-back ratio very close to the design frequency. Notice that the front-to-back ratio exceeds 20 dB for nearly 200 kHz, but it falls off rapidly when we move above or below that frequency region. The steep performance curve, like the one for gain, is a consequence of the very close element spacing.
For a moment, let us dwell on the high performance that we can obtain from the driver-director design at the design frequency. As we mentioned very early in these notes, 2-element Yagi performance is intimately related to the relative current magnitude and phase of the currents at the centers of the two elements. We saw that the driver-reflector design was limited by the inability of widely spaced parallel linear elements to achieve values close to those of either the rear-null or maximum-gain ideals.
 . . . . . . . . . . . . . . . . . . . . . . . . . . . . . . . . . . . . . . . . . . . . . . . . . . . . .
                                                   Rear Element Current
Spacing                           Mag.             Phase            F.S.              F-B
 wl              inches           (rel-            deg.             Gain              Ratio
                                  ative)                            dBi               dB

Maximum rear null:
 0.05             20.7            0.925            163.3            6.57              >50
 0.1              41.4            0.945            145              6.45              >50
Maximum gain:
 0.05             20.7            0.91             173              7.33              7.70
 0.1              41.4            0.92             166              7.36              7.22
Driver-Director design at 28.5 MHz:
 0.08             33.1            1.02             154.5            6.56              20.93

Table 11.  A comparison of relative current magnitude and phase between ideal and real Yagi designs.
 . . . . . . . . . . . . . . . . . . . . . . . . . . . . . . . . . . . . . . . . . . . . . . . . . . . . .
As Table 11 shows, the driver-director design comes considerably closer to the ideals. Although the relative rear element current is a bit high, its phase angle is close to the mean between the 0.05 and 0.1 wavelength spacing values for the experimental model. As we might expect, the front-to-back ratio of the driver-director array shows the higher level of improvement over the values for the driver-reflector array.

The improvement comes at the cost of operating bandwidth. We have already seen that the front-to-back curve is steep, meaning that performance falls off rapidly above and below the design frequency. As Fig. 21 reveals, the SWR bandwidth is equally narrow and steep. Whereas the reflector design can yield full coverage for the 28-29 MHz span, the director design covers only about half the band with under 2:1 SWR. In the graph, both SWR curves are taken relative to the resistive impedance at resonance at or very near to the design frequency of 28.5 MHz.
The effective range of use for a high-performance 2-element driver-director Yagi is a bit under 1% of the design frequency with normal sized materials. For 10 meters, such an array would be suitable as a CW-only or a 300-500 SSB antenna. However, the design type has better homes than the wide amateur bands.
The so-called WARC or non-harmonic HF ham bands are very narrow frequency allocations. 12 and 17 meters are each 100 kHz wide. Driver-director Yagis can easily cover these bands while maintaining better than a 20 dB front-to-back ratio and under 1.5:1 SWR after matching. The gain over each range will vary by about 0.4 dB. Given the fairly simply construction and load offered by these short-boom arrays, a driver-director Yagi may be just the ticket to open these bands.
Therefore, I have scaled and adjusted the basic driver-director design for each of the two highest WARC bands. Each design has had its driver length adjusted for a beta match network--that is the coil or the hairpin. If you wish to use parallel RG-59 as a 35-37 Ohm 1/4 wavelength matching section with a resonant driver, increase the driver lengths by about 2.5%. Either system has more than enough low-loss bandwidth to handle these narrow bands.

Fig. 22 shows three separate element tapering schedules. The medium duty versions should handle 75 mph winds, while the heavy duty structure should survive 100 mph winds. (Survival, of course, is also a function of all of the elements of construction, not to mention regular preventive maintenance.) The top tapering schedule is the one I used for a 12-meter version of the antenna that appeared in QST in August of 2000. The other two schedules are taken from Yagi designs in the ARRL Antenna Book.
Table 12 provides the dimensional data necessary to supplement the tapering schedules shown in Fig. 22. The values shown for the beta-match hairpin (shorted stub) are for a 600-Ohm transmission line. Such a line requires a very wide spacing (6" using #12 AWG wire). For narrower hairpins, you can either recalculate the length using the WA1SPI program or you can multiply the given length by the inverse of the ratio between the old and new line impedance values. The lower the line impedance (usually associated with narrower spacing), the longer the hairpin must be.
 . . . . . . . . . . . . . . . . . . . . . . . . . . . . . . . . . . . . . . .
                                Element Lengths
Element                 Outer                   1/2-El.     Element
                        Section                 Length      Length
Basic Design:  0.5" Uniform Diameter
Driver                                          114.0"      228.0"
Director                                        110.6"      221.2"
Medium Duty Taper Schedule Version (A)
Driver                  10.8"                   115.8"      231.6"
Director                 7.3"                   112.3"      224.6"
Medium Duty Taper Schedule Version (B)
Driver                  67.5"                   115.5"      231.0"
Director                63.8"                   111.8"      223.6"
Heavy Duty Taper Schedule Version
Driver                  62.6"                   116.6"      233.2"
Director                58.8"                   112.8"      225.6"

Beta stub:  4.8-5.0" 600 Ohm shorted line

Table 12.  Element lengths for 12-meter tapered-diameter 2-element driver-
director Yagis.
 . . . . . . . . . . . . . . . . . . . . . . . . . . . . . . . . . . . . . . .
Despite the larger average element diameter, the heavy duty element taper requires the longest elements of the set. This result is a further warning not to take short cuts when figuring the revised element lengths needed for a given element taper schedule. The amount of taper and where it occurs has a bearing on the final required dimensions, and simple averaging will rarely yield a correctly figured beam.
In the same QST issue containing the 12-meter Yagi, there is also a 17-meter version of the driver-director array. The design is perfectly satisfactory for use on this band. As shown in Fig. 23, we can adjust a basic design for numerous usable element taper schedules. The first, called a light-duty design for up to 50 mph winds, is the version in the article. (A true confession: the taper schedule permitted me to change bands just by moving the elements apart and by changing the 3/8" diameter tip sections.) Note that a medium duty taper schedule at 12 meters becomes no more than a light duty schedule when the element are significantly lengthened. The remaining taper schedules are once more drawn from the ARRL Antenna Book. They should be good for 75 mph and 100 mph winds, if everything else in the assembly is well-constructed.

 . . . . . . . . . . . . . . . . . . . . . . . . . . . . . . . . . . . . . . . . . . . . . . . . . . . . .
                                              Element Lengths
Element                           Outer                             1/2-El.           Element
                                  Section                           Length            Length
Basic Design:  0.625" Uniform Diameter
Driver                                                              157.2"            314.4"
Director                                                            152.3"            304.6"
Light Duty Taper Schedule Version
Driver                            56.0"                             161.0"            322.0"
Director                          51.1"                             156.1"            312.2"
Medium Duty Taper Schedule Version
Driver                            82.5"                             160.5"            321.0"
Director                          77.5"                             155.5"            311.0"
Heavy Duty Taper Schedule Version
Driver                            54.4"                             162.4"            324.8"
Director                          49.0"                             157.0"            314.0"

Beta stub:  7.0" 600 Ohm shorted line

Table 13.  Element lengths for 17-meter tapered-diameter 2-element driver-director Yagis.
 . . . . . . . . . . . . . . . . . . . . . . . . . . . . . . . . . . . . . . . . . . . . . . . . . . . . .
Needless to say, all of the construction hints we have mentioned in connection with the driver-reflector array also apply to the driver-director array. In addition, consult as many amateur Yagi books and articles as you can to develop your final construction strategy. Pay as much attention to the support and rotating system as you do to the beam antenna on top of the tower. A properly based tower with correct guying is not a simple or casual installation. Also, be sure to read up on lightning protection.
If we had more time and space, we might also look at a number of practical wire Yagis (and Moxon rectangles) for 80, 40, and 30 meters. In the process, we would learn how to at least make these non-rotating parasitic arrays become reversible.
And if we had still more time and space, we might also learn how to combine the performance of the driver-director array with the broad-banded characteristics of the driver-reflector array--all through the use of phasing lines. Interestingly, it is not too difficult to overcome the limitations of the ZL Special (very low feedpoint impedance) and the HB9CV (complex matching system) with a much more general phase line system made from common coaxial cables.
But my time and space have disappeared. However, I hope that the exercise leaves you a little more comfortable with 2-element beams, both in terms of understanding how they work and in terms of supplying you with versions of these parasitic arrays for 20-10 meters that you can in fact build successfully.
When you fully understand the dipole, you are 70% of the way toward understanding the 2-element beam. After you have mastered the 2-element beam, you are 90% of the way to understanding all larger arrays. For once you have added that second element, everything else is just a little more of mostly the same. However, upon reaching that point, you will find that those little differences become mighty intriguing.
Updated 5-19-2001. © L. B. Cebik, W4RNL. Data may be used for personal purposes, but may not be reproduced for publication in print or any other medium without permission of the author.